Your Ultimate Guide to Dry Brine a Thanksgiving Turkey
Dry brining is a popular way to prepare your Thanksgiving turkey as it makes turkey juicy, tender, and flavorful. But there are different reasons to dry brine or wet brine your turkey for Thanksgiving dinner. This can be a great debate as both have their pros and cons. Maybe another good question to consider is whether you should even bother with brine for your Thanksgiving turkey at all.
I have a great recipe for a dry brined bird that will leave everyone happy at Thanksgiving dinner! (See Below.)
Why Should you Brine a Turkey?
If you are like me, then the chance that you have never heard of brining your Thanksgiving turkey is incredibly low.
But if you haven’t, then you may be thinking, “why would I want to do this? Doesn’t it ruin the bird?” Well, fear not my friends! Dry brining is actually a great way to get an even crispier skin on your turkey while also locking in all of the juices for maximum flavor.

The bottom line according to Cooks Illustrated, brining makes the turkey juicier!
How does brining a turkey make it moister than an unbrined turkey? Does brining your Thanksgiving Turkey really make a difference? We look at these questions in light of some science upfront. Warning – Food Nerd Info.
What does Brining Actually do to Your Turkey?
When you brine a turkey there is a change in the structure of the proteins in the muscle. This process is really beneficial for lean (and somewhat bland) proteins like turkey, as well as other lean proteins that tend to dry out when cooked at higher heat. They can be drier because heat causes muscle fiber to contract which causes moisture to be squeezed out like wringing out a wet cloth.
Brining helps reduce this problem through osmosis and diffusion. In short, the salt in the brine causes protein strands to become unwound or loosen up. Basically, this is the same process that occurs when proteins are exposed to heat, acid, or alcohol.
Much like a braid being wind whipped into a ponytail when these strands in the meat unwind, they get tangled up with one another. This creates the ability to trap water or for the water to be absorbed.
When doing this in the traditional sense, with a wet brine, this can mean that your meat is more waterlogged than seasoned. Maybe you should save your wet brine for fish dishes.
Dry Brine vs Wet Brine – Which is Better?
What is the best way to prepare your Thanksgiving turkey? Some people say that dry brining is the best way to go, while others prefer wet brining. Let’s explore both options and see what they have to offer!
Wet Brine Pros and Cons:
Some say one major benefit of using a wet brine for your Thanksgiving turkey is that you will end up with juicier meat since the water bath allows more fluid to be drawn into the turkey. But more water doesn’t necessarily mean more flavor.
The wet brine process typically takes less time than dry brining. The traditional wet method involves soaking your turkey in water with lots of salt for 8 – 12 hours before cooking so there’s no need to rub any spice onto the surface at all! Wet brine gives you an opportunity to get that moist skin without waiting around all day.
Wet brining can also cause logistical problems for those who don’t have much room in the refrigerator. You need to submerge that large turkey in something sturdy, leakproof, and big enough to allow it to be covered in the salty solution and be kept refrigerated until you are ready to cook it.
Dry Brine Pros and Cons:
Dry brines are great for infusing your bird with some flavor much like wet brine. They can also help create crispy skin on the outside of your turkey, which is always delish!
A dry brined turkey takes up significantly less room in your refrigerator than the wet method.
Some argue dry brines are not as good at preserving moisture in your turkey, so you may end up with drier meat than some people would like. Also, if you don’t get every last bit of salt rubbed into the skin then your meat won’t be as moist when cooked.
Dry brining takes 24 – 72 hours to really make an impact. Patience and refrigeration are required.
Dry Brine = Great Way to Add Flavor and Moisture to your Turkey
According to Serious Eats, “Dry-brining cuts out the unnecessary added water by using the natural moisture content of the meat to create a concentrated brine that, when given enough time, is naturally absorbed back into the meat before cooking.”
So we know that salt draws moisture out of protein and foods. Season protein with some salt and osmosis begins. When you salt a steak, you can see that liquid begins to bead up on the surface. However, if you wait 10 – 15 minutes, the juices, or liquid, will start to dissolve the salt. This has basically created concentrated brine.
The salted meat juices, or brine, are then absorbed by the meat through diffusion. Diffusion is the net movement of anything (like the brine) from a region of higher concentration to a region of lower concentration. In other words, from the surface of the meat to the interior of the meat. This reshapes the fibers and can give the meat a better texture.
Dry Brine Ingredients for Turkey
- Salt is commonly used to give processed meats a better texture. For example, hot dogs made without salt would be limp. But stick to kosher salt, not table salt.
- Sugar can be added to the brine. Sugar doesn’t have much effect on the texture of the meat, but it does add some flavor and definitely increases better browning of the skin.
- Salt to Sugar ratio is about 2:1. Use about 2 tablespoons of salt and 1 tablespoon of sugar for every 8 pounds of turkey you intend to brine.
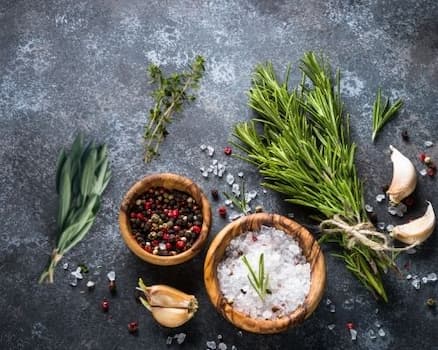
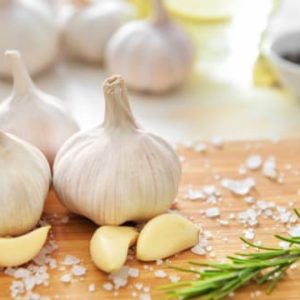
- Aromatics like grated citrus zest and spices can be added into the mix as well. Think black pepper, garlic, crushed fennel, mustard seeds, celery seeds, juniper berries, and crushed red pepper.
- Hardy fresh herbs should be considered. Just finely chop rosemary or thyme, or add any dried herbs you like. Just avoid using a lot of softer herbs like parsley, cilantro, or basil that could add too much moisture.
The idea here is to create a fairly dry brine.
How to Dry Brine a Turkey
A word of caution: Do NOT brine a Kosher, Enhanced, or Self-Basting Turkey as these types of turkeys have already been treated with a good bit of salt and do not need to be brined again.
Step 1: Prep the turkey.
Start the brining process at a minimum of one day (and up to three days) before you intend to cook your turkey. Be sure to use a fresh turkey that has not been treated with a salt solution before packaging. Look at the label for any added salt or injected saline solution. Remove the neck and giblets from the cavity of the turkey and then pat the inside and outside of the turkey completely dry with paper towels. Your turkey should be at least partially thawed before starting the dry brining process.
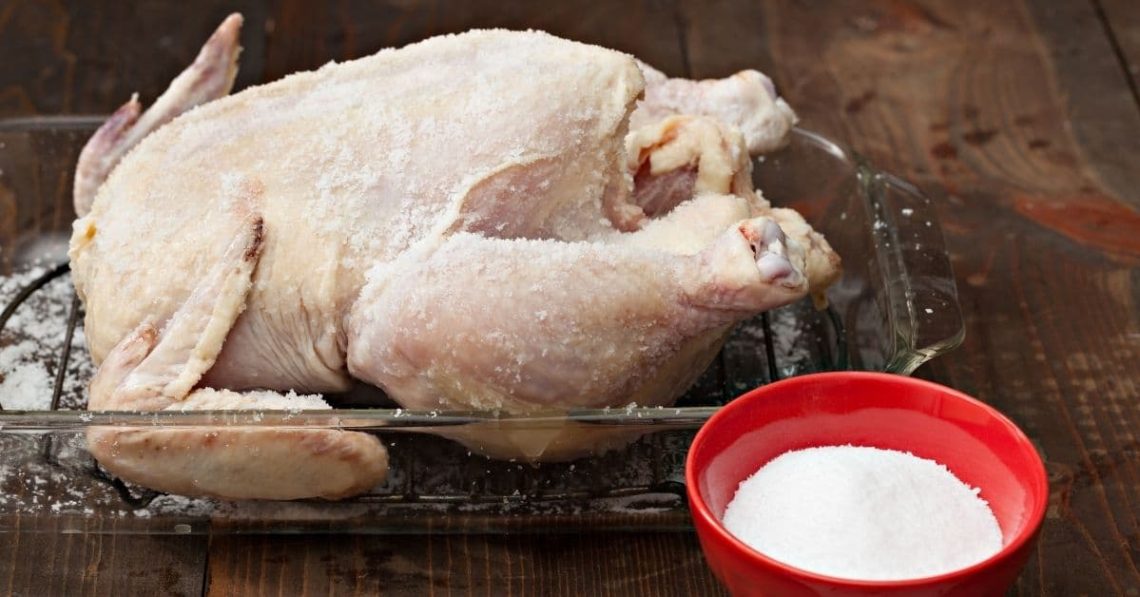
Step 2: Salt the turkey.
For an incredibly flavored brine, make the Herbed Dry Brine recipe below, and be sure to use kosher salt.
I use Morton’s kosher salt. Use about 1 tablespoon of salt for every four pounds of turkey. For a 12-pound turkey use 3 tablespoons salt and for a 20-pound turkey use about 1/3 cup salt.
Rub the mixture all over the turkey and into all the crevices. Don’t forget to sprinkle some in the cavity.
I also rub a couple of teaspoons of the brine mixture directly on the meat under the skin. Especially the breast and leg meat. But most of it goes all over the skin.
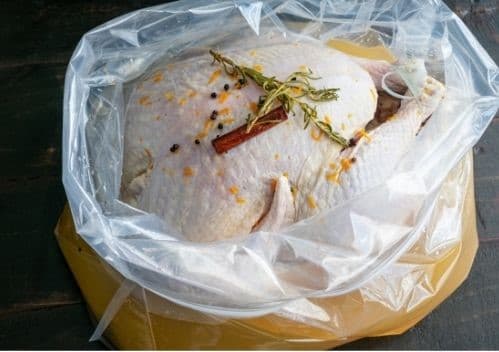
Step 3: Refrigerate the turkey uncovered.
Set your salted bird on a roasting pan or wire cooling rack set in a rimmed baking sheet – to catch any drips. Then refrigerate to brine, uncovered, for at least 1 hour per pound or 15 hours for a 15-pound turkey. For the best results, let the turkey sit for 24 – 48 hours.
We are not really worried about over brining, but you should limit the time to a maximum of three days before you cook your bird. If you don’t like a naked bird in your fridge then put a little parchment paper or plastic wrap over it for modesty. Plastic wrap is a good idea if you intend to brine your bird for more than 24 hours.
Step 4: Cook your turkey.

Remove your turkey from the refrigerator and let it sit on the counter for up to an hour.
Without rinsing, cook it in your favorite style. You can opt for the classic roast turkey, throw it on the grill or dare to deep fry your turkey using your favorite recipe. Just leave out any additional salting steps in the recipe.
Add herbed butter or dry rub to your turkey when you cook it for an even better-tasting bird!
Follow these easy steps and be prepared to enjoy one of the best turkeys you could ever prepare for Thanksgiving!
Wine Recommendations with Turkey
If you are looking for wines to serve with your Thanksgiving Feast check out my post titled 7 Fabulous Budget-Friendly Wines You Need for Thanksgiving. You’ll gain some great insights and get recommendations for white, red, rosé, and sparkling wines that will complement your holiday dinner without breaking your bank.
Yes! You should Dry Brine your Thanksgiving Turkey!
Dry brining is an excellent alternative to traditional wet brining. It may be easier than you think and it can help your Thanksgiving turkey taste great!
This year go ahead and dry brine your holiday bird for a delicious and moist Thanksgiving feast centerpiece.
Herbed Dry Brine
Ingredients
- 10 sprigs thyme
- 2 tsp dried sage
- 4 sprigs rosemary
- 5 cloves garlic, chopped
- 2 tsp celery seeds
- 3/4 tsp freshly ground black pepper, coarse grind
- 4 Tbsp Morton kosher salt
- 2 tbsp sugar
Instructions
- Roughly chop thyme and rosemary sprigs. Combine in a food processor with sage, garlic cloves, celery seeds, and black pepper. Pulse into a coarse paste. Add salt and sugar. Pulse until blended, 20 – 30 seconds.
- Cover and refrigerate for up to three days.
Notes
Cheers Y’all
P.S. Sharing is caring! Send a link to this post to a friend to enjoy or add it to your social media to share. Thanks!


You May Also Like
Best Ways How to Reheat Hollandaise Sauce
A Simple and Easy Green Salad Recipe You’ll Make Again